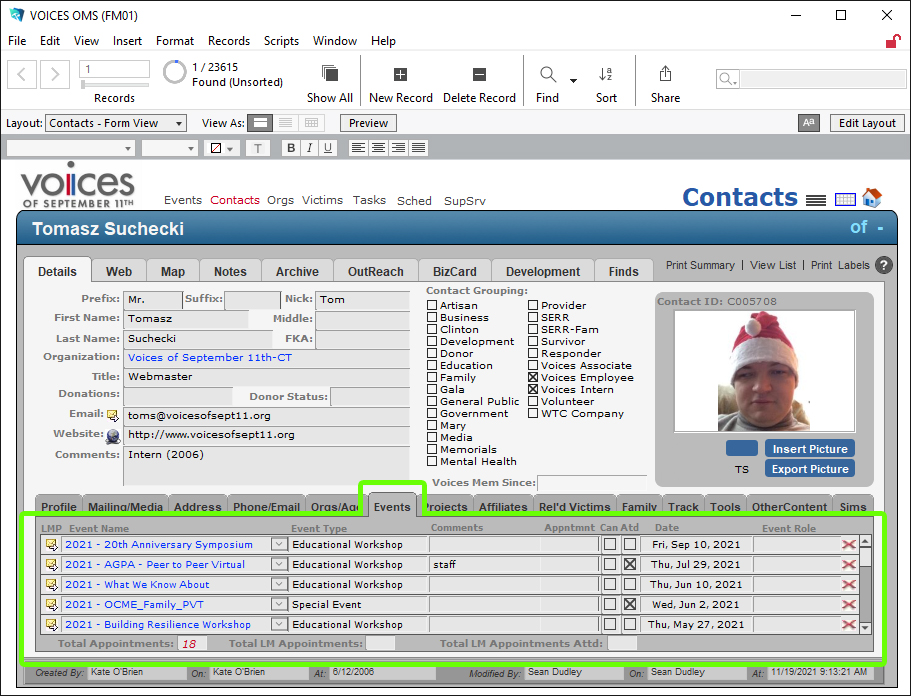
Open Contacts
Open "Contacts"
When opening Contacts in FileMaker, a search will pop up automatically. To learn how to cancel the find,
click here.
Searching for a Contact
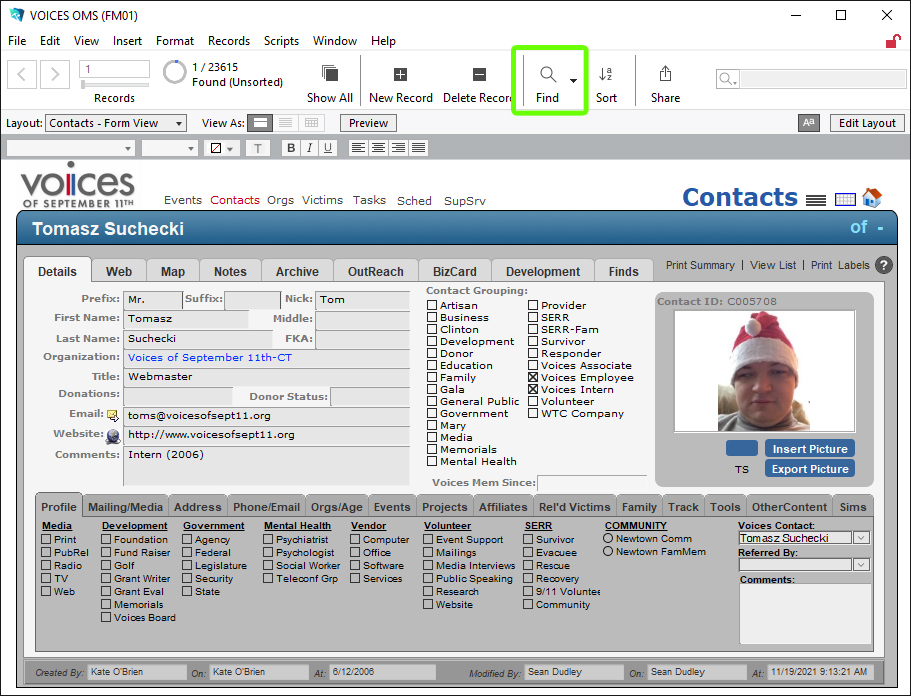
Click "Find"
Enter Information in the empty fields to find contact.
Many fields have an autofill function when typing. Make sure spelling is correct when typing into a field. If you are unsure of spelling, just enter the first few letters and all corresponding records will show up. For example, if you didn't know how to spell the name "Smith", just typing S-M-I will bring up records with those first three letters.
Also, there are also some general tips and rules to follow when searching for a contact. These are:
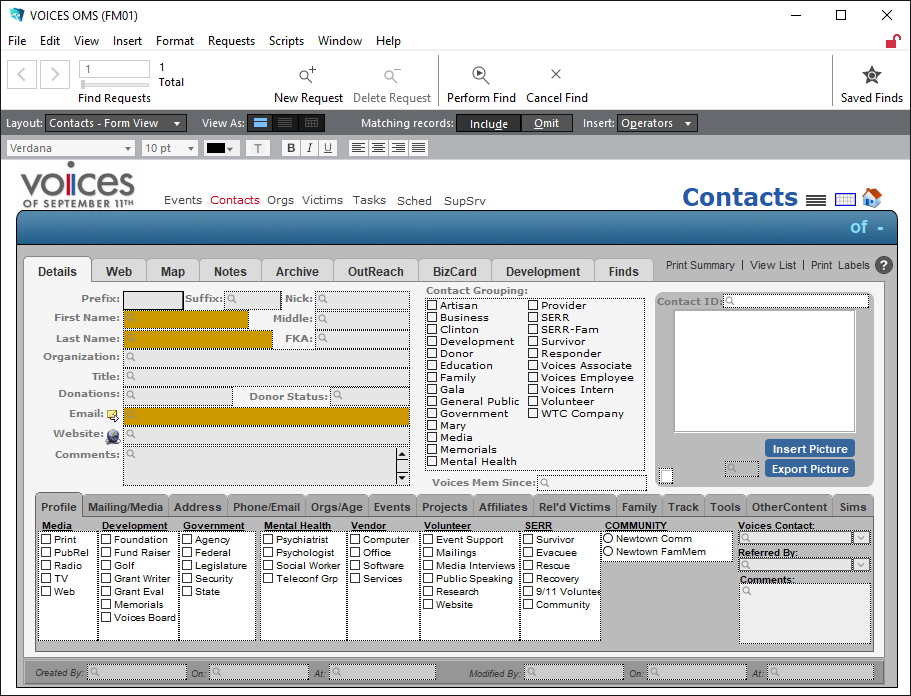
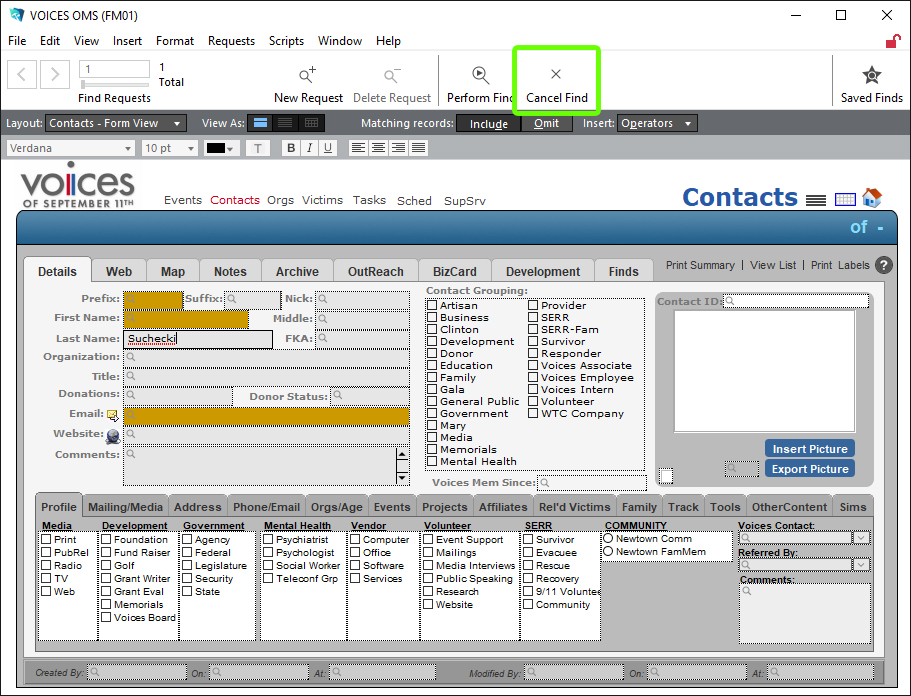
- Be 100% sure you're in a find when looking up contacts. If you see orange fields in the first name, last name, and email with a dark grey bar on the top, you're in a find. If you don't see the orange fields and grey bar, or you see text in the image field that says “STOP, This is a contact, You are not in a search” then you are NOT in a find (specifically Hannah Aalborg if you see the stop text). Otherwise, you'll just be modifying a contact. And if you change a contact's name without noticing, there is no way I can search for and correct that mistake by other than sheer luck. So take your time and be very careful with searches and modifying records.
- When doing a find, make sure to search by a single field at a time. Don't enter all the information about a contact when looking for a contact, you usually won't find it. Instead, look for a single field, and generally I've found the "Last Name" field the most useful. So rather than fill every field for a “John Smith that lives in New Canaan”, just search for the last name “smith”. Yes, you will likely have to manually sort through multiple contacts with the same last name, but it will prevent a ton of work in deleting duplicate contacts. For longer names, feel free to type only the first few characters of a name, then the delete key. Using smith as an example, type in "smi", then click the delete button on your keyboard. This is done to help find contacts with complicated names, or different ways of spelling them (like: Shawn and Shaun). Additionally, you can use the sort button on the top, move “ConFirstName” into the sort order, in order to sort your search results by first name to help find your contact quicker.
- The "@" symbol causes searches to not work properly, so when searching by email, either search by the text before or after the “@” symbol. For example, with an email called johnsmith@mywebsite.com either search for "johnsmith" or "mywebsite.com" in the email field. This applies to most other special characters as well, as they are used to help designate search parameters.
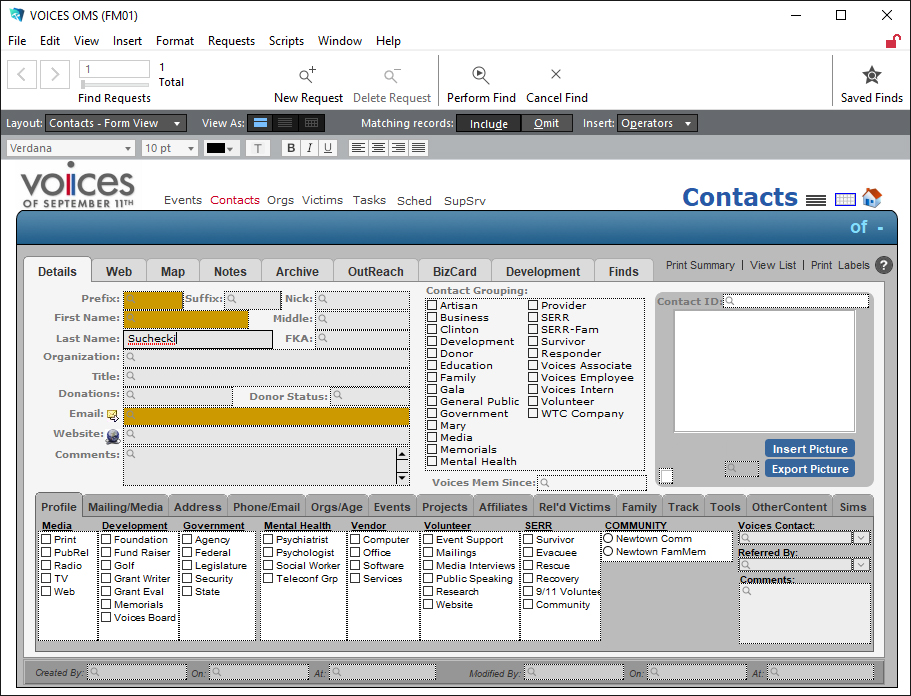
To add additional search criteria(s) select "New Request" while in a search.
Select "Perform Find" on the top of the screen to search records
If you need to cancel the find for any reason, click "Cancel Find." The icon is next to the "Perform Find" button
Advanced Search Criterias | Finding ranges of information
You can find ranges of information, such as all records that contain a field value that is greater or less than a number, or between two particular dates. A range is different based on the data type:
- Numbers: least to greatest
- Dates, times, and timestamps: earliest to latest
- Text: first to last word, based on the index order of words (not the sort order). A word can be a single character; for example, a find on a field for <M would return every record that contains a word less than M in the field’s index order.
- Use "Omit" to exclude any criteria in a search request.
To view all operators required for advanced searches,
click here. As an example of an advanced search, to search for a deceased contact, put ">1/1/2000" in the "Date Deceased" field, under the "Orgs/Age" tab.
Entering Data / Updating a Contact
Creating New Contact
To create a new contact, select the "New Record" icon at the top. A first and last name must be entered at all times. Also, be sure to search for the contact before creating a new contact to prevent adding duplicates.
Also, there are also some general tips and rules to follow when creating for a contact. These are:
- When using copy and paste to enter text into any field in FileMaker, paste into a notepad document first and recopy to paste into FileMaker. This removes all formatted text. Formatted text corrupts searches. If you have issues finding notepad, use the search bar by the start button and type “Notepad”, every Windows computer has this program installed by default.
- Be sure to review any information you enter into FileMaker. A single incorrect character can break an email or make a record unsearchable. Common mistakes are misspelling “gmail”, extra spaces, line breaks, or using a comma instead of a period.
- Make sure the contact you're creating doesn't exist. While this may seem like common sense, just be aware of nicknames, hyphenated names, or name misspellings. And be sure to compare emails, phone numbers, or addresses if you're not sure if a contact is the same.
Basic Information
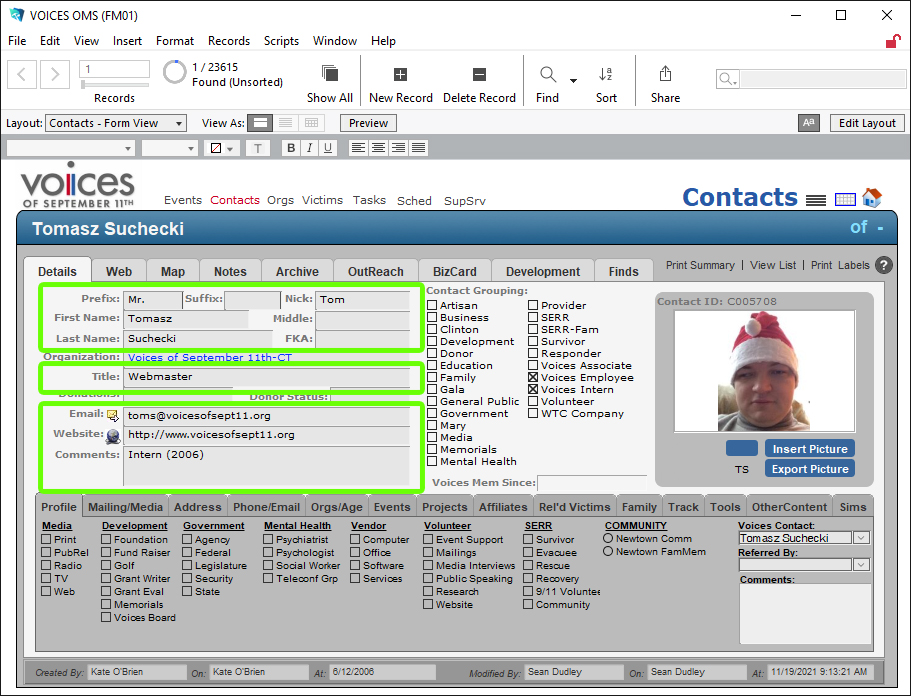
When adding data to a contact, the fields listed below are some of the basic fields that can be filled out.
Quick Entry
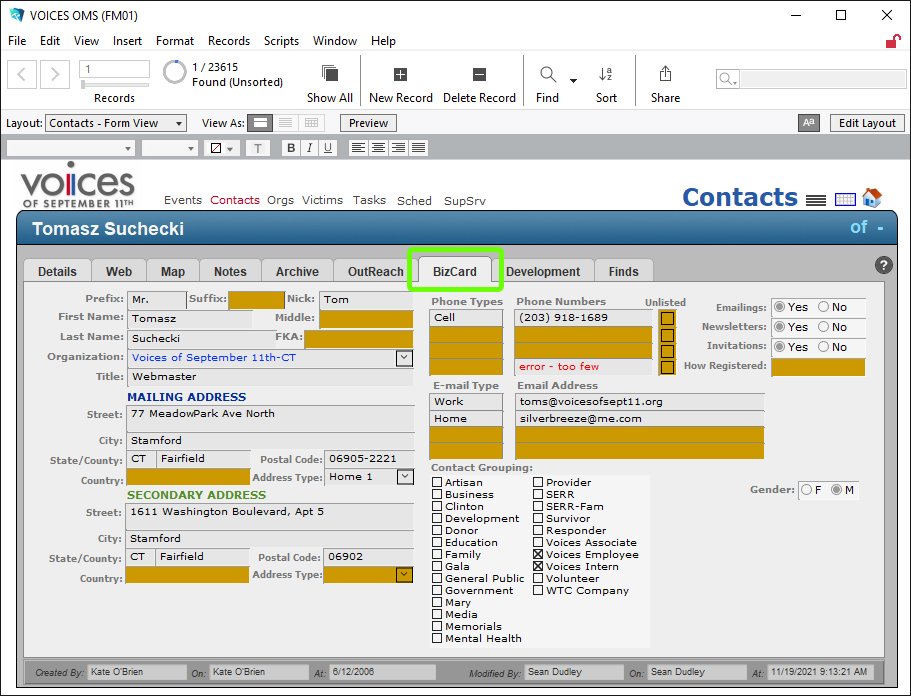
By selecting the "BizCard Entry" field, you can enter much more data than in the basic details panel. Consider it a quick-access for entering in data
Attached notes
This field lists all notes attached to a contact. To add a note, scroll to find an empty field and enter the data for the note.
Profile
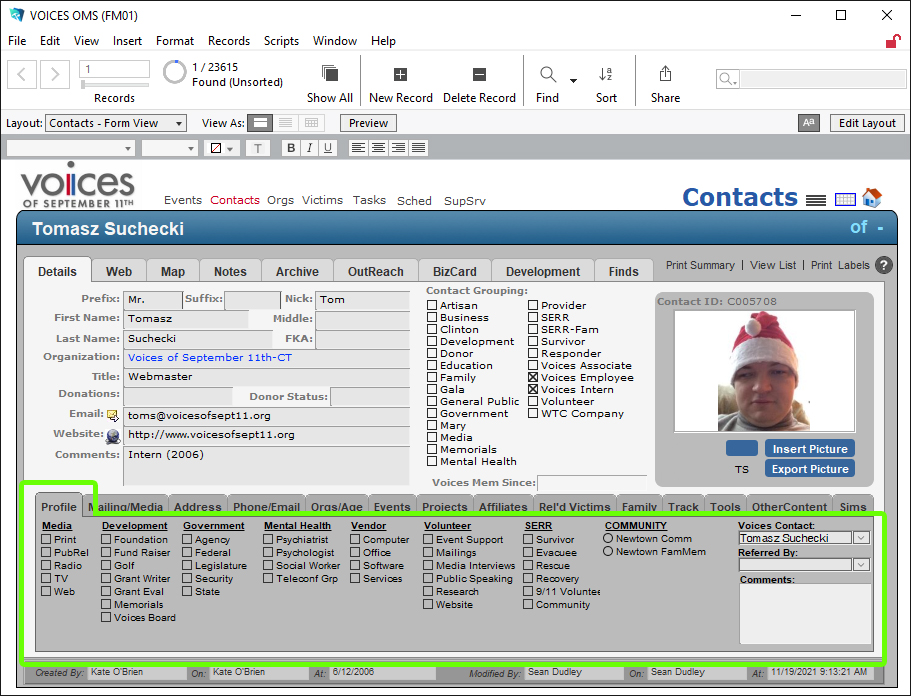
This field lists checkboxes for various industries. Select the checkbox as it corresponds to the contact.
Mailing/Media
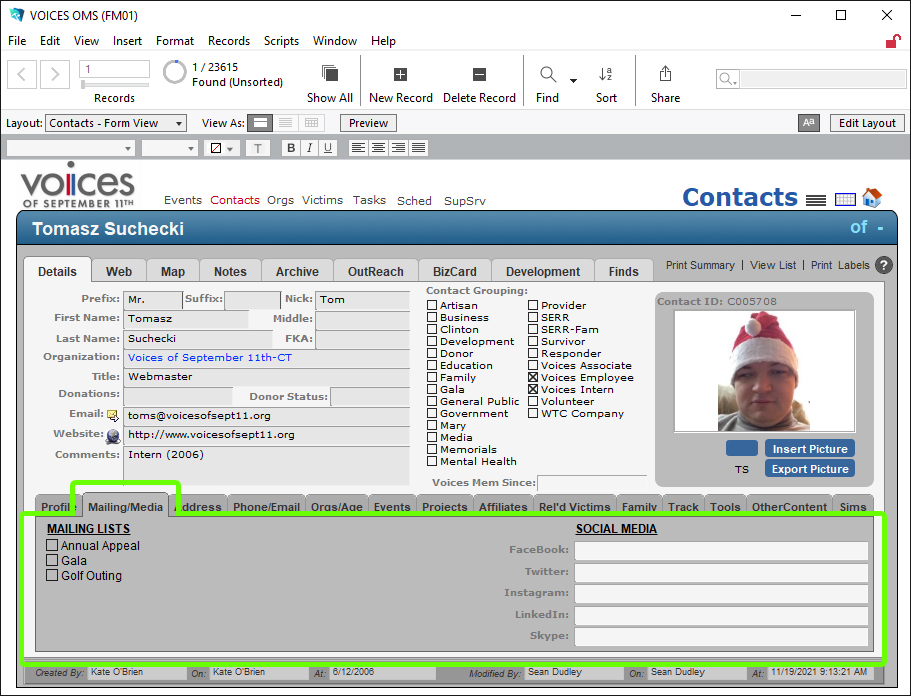
This tab gives an option to add a contact to a specific mailing list (currently only in use by golf) and is a location to enter social media links/handles.
Address
This tab lists both the primary and secondary address.
Phone/Email
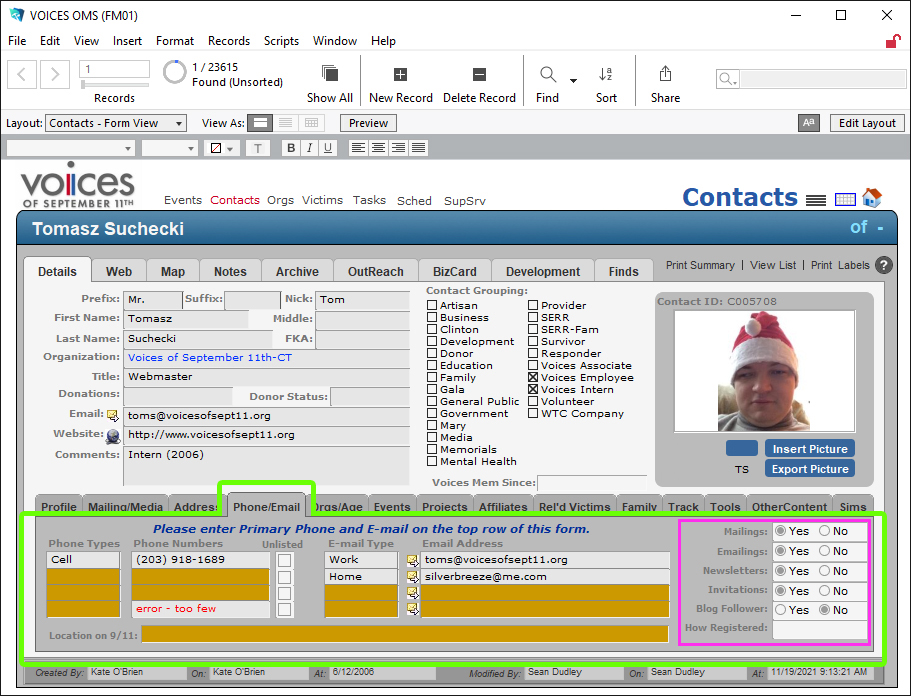
In this tab, you can list up to 4 phone numbers and 4 e-mail addresses. Also is multiple checkboxes regarding contact/outreach preferences. In regard to these outreach preferences, they have been separated into multiple categories with a yes no option (highlighted in pink). By default, any new contact is marked "No" in all of these categories.
The defenition for these categories are as follows:
- Mailings | This is to determine whether a contact is to recieve physical postage mailings. To be eligible to recieve mailings, a contact must:
- Have a valid address
- Must not be deceased
- Opted to recieve mailings (generally this is a yes if they gave us their address willingly)
- Must verify there is no duplicate address on a different contact
- Emailings | This is to determine whether a contact is to recieve mass emails through an email marketing platform (ex: Mailchimp, Constant Contact). To be eligible to recieve emailings, a contact must:
- Have a valid email address
- Must not be deceased
- Opted to recieve emailings (For a new contact, this will not be an issue. But users have to option to unsubscribe. Also, bad emails get marked as "Bounced" by the marketing platform.)
- Must verify there is no duplicate email address on a different contact
- Newsletters: | This is to determine whether a contact is to recieve "VOICES Newsletters" through an email marketing platform (ex: Mailchimp, Constant Contact). To be eligible to recieve emailings, a contact must:
- Have a valid email address
- Must not be deceased
- Opted to recieve emailings (For a new contact, this will not be an issue. But users have to option to unsubscribe. Also, bad emails get marked as "Bounced" by the marketing platform.)
- Must verify there is no duplicate email address on a different contact
- Invitations | Currently not in use
- Blog | Currently not in use
Organization/Age
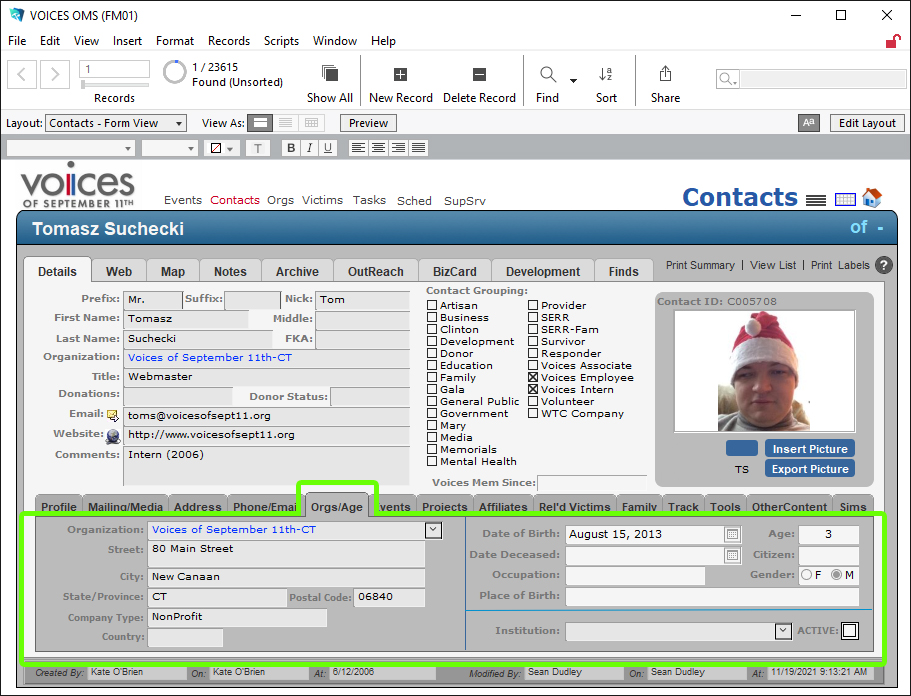
This tab lets you choose an Organization from a dropdown. The fields for the organization are automatically generated from the organization (as created in "Organizations"). You can also enter data for the date of birth, gender, date deceased (put a valid date in this field to mark a contact as deceased), etc.
Events
This tab lets you choose an Event from a dropdown. The fields for the organization are automatically generated from the event, with the exception of Comments and Appointment.
Deleting a Contact
If you ever need to delete a contact, do not attempt to do so yourself.
You may mark a contact to be deleted (which will be reviewed by a FileMaker admin). To do this, go to the Track tab, and check the box labeled "Marked for Deletion"
There are criteria for which a contact should never be deleted. These are:
- Contact has a donation history
- Contact has attended a past event
- Contact was a past VOICES staff/intern
- Contact has connections with other parts of the database (like related victim)


